
Revitalize your dingy old deck by using a teak cleaner and brightener, followed by pressure washing. Has your once beautiful deck lost its luster?
Over time, exposure to the elements can leave your deck looking tired and worn. But fear not! With the right tools and techniques, you can breathe new life into your dingy old deck and restore it to its former glory.
In this guide, we’ll explore some effective methods for revitalizing your weathered deck, from power washing and deck cleaning to staining and sealing. By following these steps, you can have your deck looking fresh and inviting once again, ready for you to enjoy those lazy summer days and outdoor gatherings with friends and family. Let’s get started on bringing your old deck back to life!
Assessing Your Deck’s Condition
Before you can begin revitalizing your dingy old deck, it’s important to assess its current condition. This will help you identify any areas that need repair and determine the best course of action to restore your deck to its former glory.
Signs Of Wear And Tear
When assessing your deck, keep an eye out for these common signs of wear and tear:
- Cracked or splintered wood
- Loose or missing screws or nails
- Rot or decay
- Discoloration or fading
- Warped or uneven boards
These signs indicate areas that may require repair or replacement. Identifying them early on will help you prevent further damage and ensure a successful revitalization process.
Identifying Areas Needing Repair
Once you’ve identified the signs of wear and tear, it’s time to pinpoint the specific areas needing repair. Take a closer look at your deck and pay attention to the following:
- Inspect each individual board for cracks, splinters, or rot. Replace any damaged boards to ensure the structural integrity of your deck.
- Check the connections between boards, such as screws or nails. Tighten or replace any loose or missing fasteners to secure the deck’s stability.
- Examine the support posts and beams for signs of decay or damage. Reinforce or replace them if necessary to maintain the overall strength of your deck.
- Assess the railing and stairs for stability. Make sure they are firmly attached and in good condition to ensure safety.
By carefully assessing your deck’s condition and identifying the areas needing repair, you’ll be able to create a targeted plan for revitalization. This will save you time, effort, and money in the long run, as you’ll be addressing the underlying issues and ensuring a durable and beautiful deck for years to come.
Cleaning: The First Step To Renewal
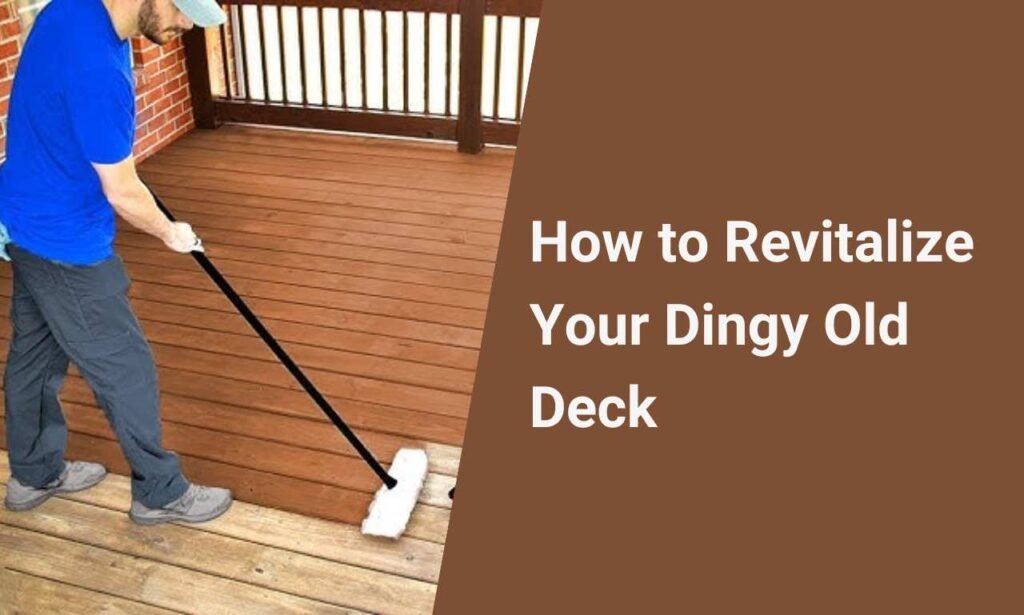
Cleaning is the crucial first step to rejuvenating your dingy old deck. By using a stiff brush to scrub away dirt and loose wood bits, and then washing it down with water or a jet wash, you can bring your deck back to life.
For extra cleaning power, a decking cleaner and reviver can do the hard work for you.
Cleaning: The First Step to Renewal Revitalizing an old deck can be a daunting task, but with the right tools and techniques, it can be done in no time. The first step to renewal is cleaning. Before you can begin any repairs or refinishing, you need to clean the deck thoroughly.
This will remove any dirt, mildew, or other debris that has accumulated over the years and prepare the deck for the next steps. Choosing the Right Cleaning Products When it comes to choosing the right cleaning products, it’s important to select ones that are specifically designed for deck cleaning. These products are formulated to remove dirt, grime, and other stains without damaging the wood.
Some popular options include Star Brite Teak Cleaner & Brightener, which can restore weathered, gray, or teak wood, and Behr Premium All-In-One Wood Cleaner, which is ideal for removing stains caused by mildew, algae, or mold. DIY Deck Scrubbing Techniques If you prefer a more hands-on approach, there are several DIY deck scrubbing techniques you can try.
One popular method is to mix equal parts of water and oxygen bleach and apply it to the deck with a scrub brush. Allow the solution to sit for 10-15 minutes before rinsing it off with a hose.
Another technique is to use a pressure washer, which can blast away dirt and grime with ease. However, be careful not to set the pressure too high, as this can damage the wood. In conclusion, cleaning is the first and most important step to revitalizing your dingy old deck.
Whether you choose to use commercial cleaning products or DIY techniques, make sure to follow the instructions carefully and take precautions to protect yourself and your deck. With a little elbow grease, your deck will look like new again in no time.
Power Washing For Deep Clean
Power washing is an essential step in revitalizing a dingy old deck. It helps to remove deep-seated dirt, grime, and stains, leaving your deck looking fresh and ready for the next steps in the restoration process. In this section, we’ll explore the important aspects of power washing for a deep clean and how to do it safely.
Setting Up Your Pressure Washer
Before diving into the power washing process, it’s crucial to set up your pressure washer correctly. Here’s a simple guide to ensure you’re all set:
- Read the manufacturer’s instructions for your specific pressure washer model.
- Attach the appropriate nozzle for deck cleaning, usually a 25- to 40-degree tip to prevent damage to the wood.
- Connect the pressure washer to a water source and ensure all connections are secure.
- Familiarize yourself with the washer’s controls and safety features.
Safety Measures During Power Washing
Power washing can be a powerful tool, but it also requires caution to avoid damage and ensure personal safety. Here are some safety measures to keep in mind:
- Wear protective gear, including safety goggles, gloves, and non-slip footwear to prevent accidents.
- Keep the nozzle at least 6-12 inches away from the deck surface to prevent splintering or gouging the wood.
- Avoid spraying directly at joints, as the high pressure can force water into the gaps, causing damage.
- Work in small sections and move the nozzle consistently to maintain an even clean.
- Test the pressure on a small, inconspicuous area of the deck to ensure it’s not causing damage before proceeding with the entire surface.
Stripping Old Finishes
Revitalize your dingy old deck by stripping away old finishes to reveal its natural beauty. Use a quality stripper, apply, and scrub to remove dirt and debris. Rinse with water or a pressure washer for a fresh, clean surface ready for refinishing.
Selecting A Deck Stripper
To revitalize your dingy old deck, the first step is stripping away old finishes to reveal a fresh surface. When selecting a deck stripper, consider the type of finish you are removing and the wood type of your deck. Look for a biodegradable and eco-friendly deck stripper for best results.
Application Tips For Effectiveness
For effective application of the deck stripper, follow these tips:
- Wear protective gear including gloves and goggles.
- Apply the stripper evenly using a brush or roller.
- Allow the stipper to sit for the recommended time before scrubbing or rinsing.
- Scrub the deck with a stiff brush to remove the old finish.
- Rinse thoroughly with water to remove all residue.
Brightening Your Deck
Your deck is an outdoor oasis, providing a space for relaxation and entertainment. However, over time, exposure to the elements can leave your deck looking dull and dingy. One effective way to revitalize your deck and bring back its original beauty is by brightening the wood. In this section, we will explore the process of brightening your deck using a wood brightener.
What Is Wood Brightener?
A wood brightener is a specially formulated solution designed to restore the natural color and brightness of weathered wood. It is typically used on decks, fences, and other exterior wooden surfaces that have become discolored or grayed due to sun exposure, moisture, and dirt buildup. Wood brighteners are often used as a pre-treatment before staining or sealing the wood.
Applying Wood Brightener Properly
To ensure the best results, it is important to apply the wood brightener properly. Here are the steps to follow:
- Clean the deck: Before applying the wood brightener, thoroughly clean the deck to remove any dirt, debris, or mildew. This can be done using a deck cleaner and a scrub brush or a pressure washer. Make sure to follow the manufacturer’s instructions for the deck cleaner.
- Prepare the wood brightener: Dilute the wood brightener according to the manufacturer’s instructions. Some wood brighteners come in concentrated form and need to be mixed with water.
- Apply the wood brightener: Use a pump sprayer or a brush to apply the wood brightener evenly onto the deck surface. Start from one end and work your way towards the other, making sure to cover all areas.
- Let it sit: Allow the wood brightener to sit on the deck for the recommended amount of time, usually around 15-20 minutes. This will give the solution enough time to penetrate the wood and remove any stains or discoloration.
- Rinse the deck: After the designated time has passed, thoroughly rinse the deck with clean water. This will remove the wood brightener along with any dirt or residue.
- Inspect the results: Once the deck is dry, take a close look at the wood. You should notice a significant improvement in its color and brightness. If necessary, you can repeat the wood brightening process for stubborn stains or heavily discolored areas.
By following these steps and using a high-quality wood brightener, you can effectively revitalize your dingy old deck and bring it back to life. Remember to always read and follow the instructions provided by the manufacturer for the best results.
Repairing Damaged Wood
Revitalize your dingy old deck by repairing damaged wood with a thorough cleaning, stripping, and staining process. Use a power washer to remove dirt and grime, then apply a wood cleaner and brightener to restore its natural beauty. Finally, protect the wood with a high-quality deck sealer to prolong its life and enhance its appearance.
Repairing Damaged Wood is an essential step in revitalizing your old deck. Over time, decks can suffer from minor cracks or more significant damage that requires replacement of the affected boards. In this section, we will cover Fixing Minor Cracks and Replacing Rotted or Damaged Boards, both of which are essential for restoring the beauty and functionality of your deck.
Fixing Minor Cracks
Minor cracks can occur in your deck as a result of weathering or normal wear and tear. These cracks can be fixed with a simple DIY solution. Start by cleaning the affected area and then filling the crack with an exterior wood filler. Be sure to choose a filler that matches the color of your deck and apply it evenly with a putty knife. Once the filler dries, sand the area until it’s level with the rest of the deck. Finally, apply a sealant to protect the repaired area from future damage.
Replacing Rotted Or Damaged Boards
If your deck has boards that are rotted or damaged beyond repair, you’ll need to replace them. Start by removing the damaged board with a pry bar and cutting a new one to size. Be sure to use pressure-treated wood or a similar material that’s resistant to moisture and insects.
Once you have the new board, slide it into place and secure it with galvanized deck screws. Finally, sand the area until it’s smooth and apply a sealant to protect the new board from future damage. In conclusion, repairing damaged wood is an essential step in revitalizing your old deck.
Whether you’re fixing minor cracks or replacing rotted or damaged boards, taking the time to repair your deck will help ensure that it’s both beautiful and functional for years to come.
Sanding For Smoothness
Revitalizing a worn-out deck often begins with sanding, a crucial step that helps achieve a smooth and appealing surface. Proper sanding not only enhances the visual appeal of the deck but also prepares it for staining or painting, extending its lifespan. Let’s delve into the key aspects of sanding to breathe new life into your old deck.
Choosing The Right Sandpaper
Selecting the appropriate sandpaper grit is essential for achieving the desired smoothness. Coarse grits like 40-60 are suitable for initial sanding to remove old finishes and level uneven surfaces.
Medium grits (80-120) are ideal for preparing the deck for staining or painting. Fine grits (150-180) help in achieving a polished and smooth finish. Consider the condition of your deck and the type of wood to choose the right sandpaper for each phase of sanding.
Sanding Techniques For Even Surfaces
To ensure an even and uniform surface, it’s important to sand parallel to the wood grain. Use a back-and-forth motion, applying consistent pressure. For hard-to-reach areas and edges, a sanding block or detail sander can be employed. Regularly inspect the surface to identify any uneven spots and focus on them until achieving a uniform texture. After sanding, remove all dust and debris using a brush or vacuum before proceeding with staining or painting.
Staining And Sealing
Staining and sealing your deck is a crucial step in revitalizing its appearance and protecting it from the elements. By applying the right stain and sealer, you can enhance the natural beauty of the wood and prolong its lifespan. Let’s explore the key considerations for this important stage of deck restoration.
Picking The Perfect Stain
Choosing the right stain for your deck involves considering the wood type, desired color, and level of protection. Semi-transparent stains are ideal for showcasing the wood’s natural grain, while solid stains provide more extensive coverage and UV protection. It’s essential to select a stain that complements your deck’s aesthetics while providing the necessary durability.
Sealer Application For Longevity
Applying a high-quality sealer is essential for safeguarding your deck against moisture, UV rays, and general wear and tear. Penetrating sealers are designed to soak into the wood, offering long-lasting protection without altering the deck’s appearance. Film-forming sealers create a protective layer on the surface, offering enhanced water resistance and UV protection.
Final Touches And Maintenance
Revitalizing an old deck involves final touches and maintenance to make it look new again. This can include pressure washing, sanding, applying a deck cleaner, and sealing or staining the wood. Using quality products and following proper techniques can extend the life of your deck and enhance your outdoor space.
Final Touches and Maintenance: After completing the major restoration work on your deck, it’s time to add the final touches and implement a routine maintenance plan to keep your deck looking new for years to come. Here are some tips for installing new fixtures, routine deck maintenance, and applying finishing touches:
Installing New Fixtures
Routine Deck Maintenance Tips
Installing New Fixtures: If you’re looking to upgrade the look and functionality of your deck, consider installing new fixtures such as railings, lighting, or a pergola. These additions not only enhance the aesthetic appeal of your deck but also provide practical benefits such as safety and comfort.
When selecting new fixtures, make sure they are made of durable materials that can withstand harsh weather conditions and frequent use. Routine Deck Maintenance Tips: Routine maintenance is crucial to keeping your deck in top condition. Here are some tips to help you maintain your deck:
– Regularly clean your deck with a soft-bristle brush and mild soap to remove dirt, debris, and stains.
– Inspect your deck regularly for signs of wear and tear, such as loose or splintered boards, and make repairs as needed.
– Apply a protective finish to your deck every few years to prevent water damage and extend the life of your deck. –
Sweep your deck regularly to prevent the buildup of leaves and other debris that can cause moisture buildup and lead to rot.
By following these simple maintenance tips and adding some finishing touches, you can revitalize your dingy old deck and enjoy it for many years to come.
Frequently Asked Questions
How Do I Bring My Old Deck Back To Life?
To bring your old deck back to life, follow these steps:
1. Scrub the deck with a stiff brush to remove dirt and loose wood.
2. Clean the deck using water or a jet wash.
3. For heavily soiled decks, use a decking cleaner and reviver.
4. Inspect the deck for any damage and replace rotted or damaged boards.
5. Tighten or replace screws, brackets, and fasteners.
6. Fix minor cracks with polyurethane caulk.
7. Prepare the deck for refinishing by sanding if necessary.
8. Apply a deck stain or paint to revitalize the wood.
9. Seal the deck with a waterproof sealer for protection. By following these steps, you can rejuvenate your old deck and make it look like new again.
How Do You Rejuvenate Old Decking?
Revitalize old decking by scrubbing with a stiff brush, then cleaning with water or a pressure washer. For tough dirt, use a decking cleaner.
How Do You Make An Old Weathered Deck Look Good?
To make an old weathered deck look good, inspect, tighten screws, replace damaged boards, and clean thoroughly with a pressure washer or deck cleaner. Apply a fresh coat of stain or paint to revitalize its appearance.
How Do You Brighten An Old Deck?
To brighten an old deck, use a deck cleaner and a stiff brush to scrub off dirt and loose wood. Rinse with water or a pressure washer. Consider using a deck brightener for stubborn dirt. For deeper revitalization, use a deck stripper, sanding, and apply a new stain or sealant.
Conclusion For Revitalize Your Dingy Old Deck
Reviving your old deck is a breeze with these simple steps. From cleaning to staining, transform your weathered deck into a stunning outdoor space. Don’t forget to maintain it regularly for long-lasting beauty and functionality. Follow these tips to enjoy your revitalized deck for years to come.